Jump to Recipe Print Recipe
Starting my day with eggs for breakfast is my daily routine and something I truly love. However, I often got bored of eating them prepared in the same style. One day, I thought, “Let’s try something different—Creamy Scrambled Eggs!”
I headed to the kitchen full of enthusiasm. Everything was ready: fresh eggs, cream, and butter. I thought it would just take a minute! But the real challenge began when I started cooking.
-
Difficulty 1: Heat Control: My first challenge was managing the heat. I was in a hurry, so I kept the flame a bit too high. As soon as the eggs hit the pan, they began to set very quickly, and I feared they would turn rubbery instead of creamy.
-
Cover-up: I immediately took the pan off the stove and began gently folding them with a rubber spatula so the texture would become smooth again.
-
Difficulty 2: Fear of Consistency: When the eggs were half-cooked, I couldn’t figure out when to stop. I was afraid of overcooking them.
-
Cover-up: Then, I remembered the “carry-over” rule—you should take the eggs off the heat when they still look a bit “wet,” because the residual heat will make them perfect once they are on the plate.
When I took my first bite, they were so soft and velvety that I couldn’t believe I had made them myself! That day, I learned that instead of rushing, a little patience and the right technique are the keys to true flavor.
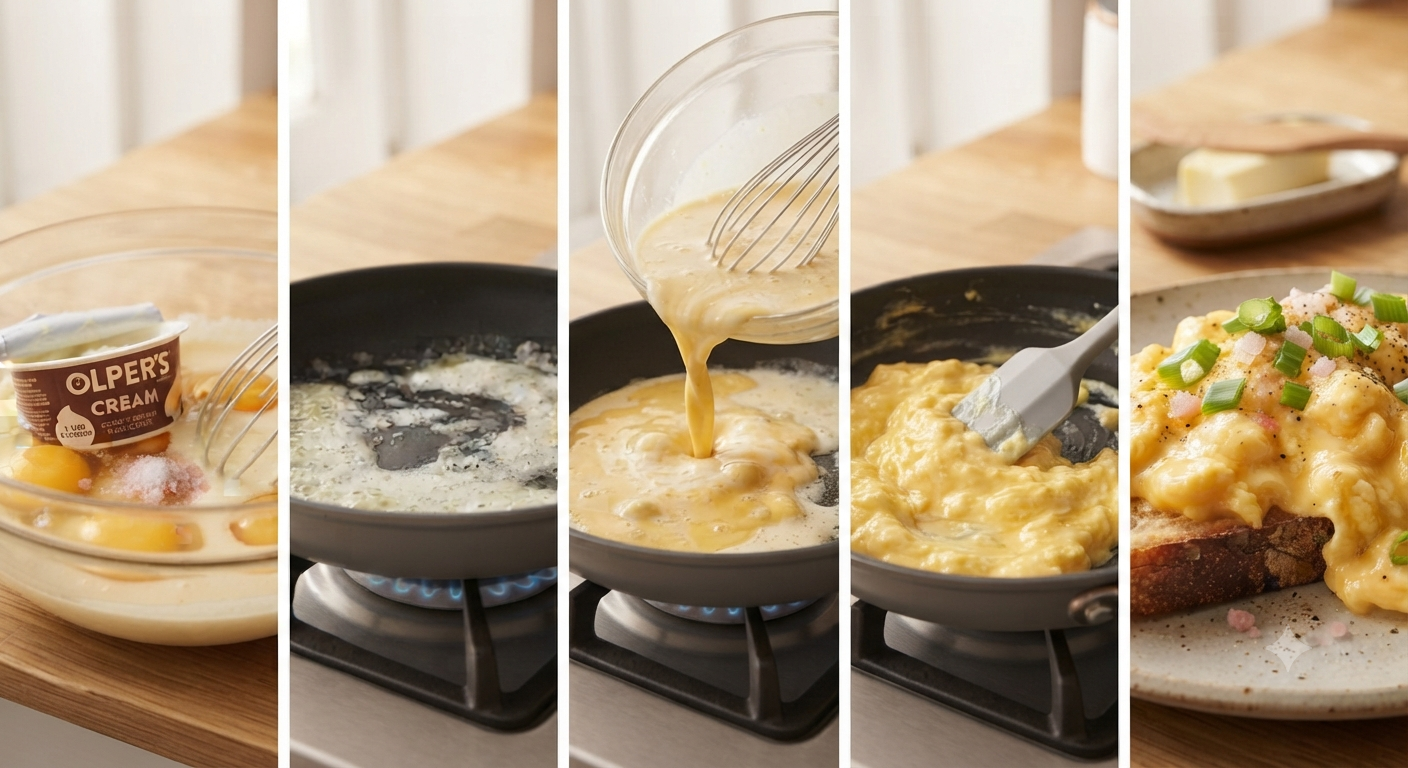

Perfectly Creamy Scrambled Eggs: My Step-by-Step Culinary Guide
Ingredients
Equipment
Method
- Instructions
- Prepare the Egg Mixture
- In a medium mixing bowl, combine the eggs, room-temperature Olper’s cream, and Himalayan pink salt. Whisk vigorously until the mixture is completely uniform, with no visible streaks of egg white remaining. Whisking in the cream thoroughly at this stage is essential for the final velvety texture.
- Initialize the Pan
- Place a non-stick frying pan over low heat. Add the butter and allow it to melt slowly. Ensure the butter coats the entire surface of the pan, but do not allow it to brown or foam excessively.
- Gentle Coagulation
- Pour the egg and cream mixture into the pan. Allow it to sit undisturbed for about 30 seconds until the edges begin to set slightly. Using a silicone rubber spatula, begin to pull the mixture across the bottom of the pan in long, steady strokes. This technique creates the signature large, soft, custard-like curds.
- Precise Heat Control
- Continue to cook on low heat, folding the eggs gently. It is important to work slowly; if the pan gets too hot, remove it from the heat source for a few seconds before returning it to the burner.
- Finishing the Eggs
- Remove the pan from the heat when the eggs are mostly set but still appear slightly "wet" or glossy with a small amount of liquid egg remaining. The residual heat from the pan will finish the cooking process on the plate, preventing the eggs from becoming rubbery or over-coagulated.
- Plating
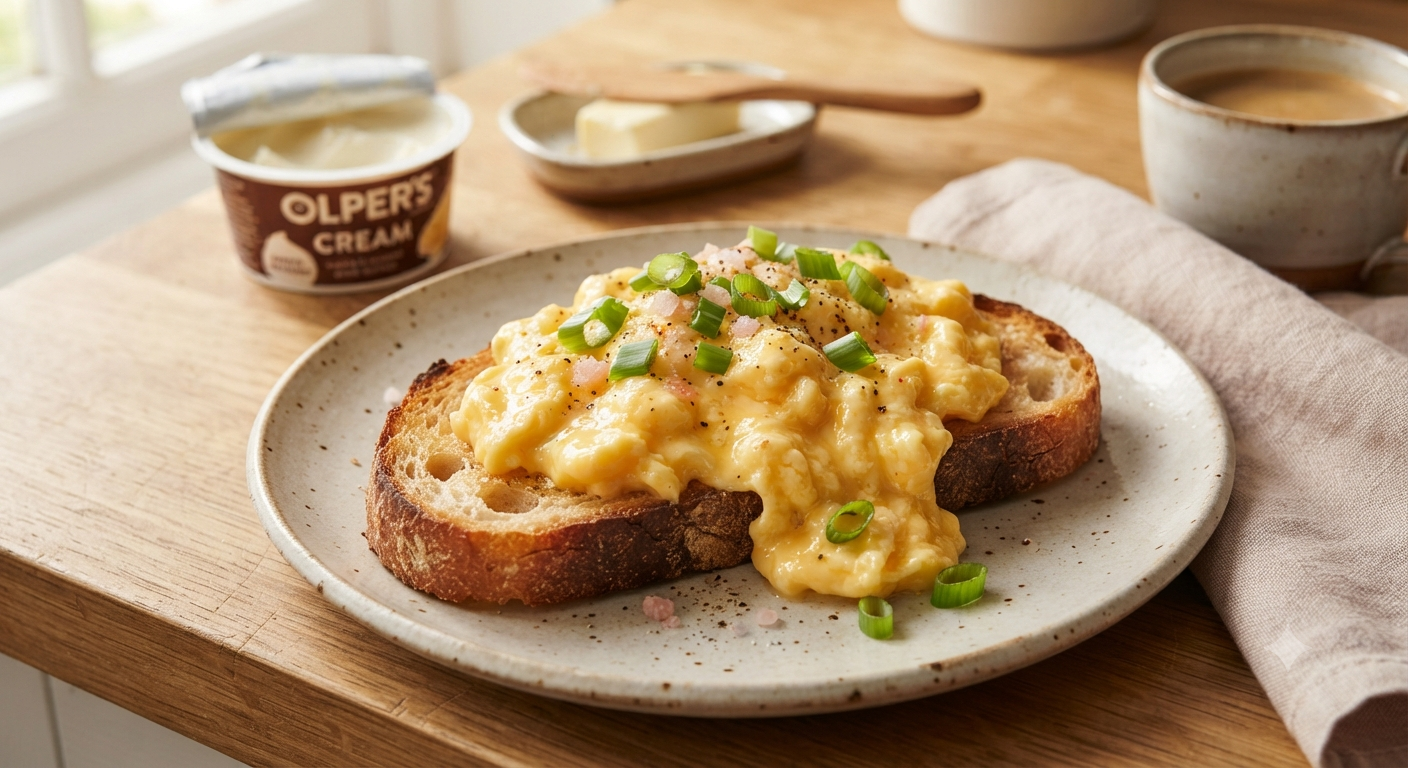
- Immediately spoon the creamy eggs onto toasted sourdough bread. Sprinkle generously with fresh, chopped spring onion leaves to add a pop of color and a mild, crisp finish. Serve immediately while warm.
- Chef's Note: For the best results, ensure both the eggs and the cream are at room temperature before you begin. Mixing cold ingredients into a hot pan can cause the butter and cream to separate, impacting the final consistency of your scramble.